Conceive textures
Conceive textures
In this tutorial we will create two textures for the door:
- First we will open the door model created previously.
- Then we will draw two textures for the ground and the wall.
- Finally we will apply these textures on the model.

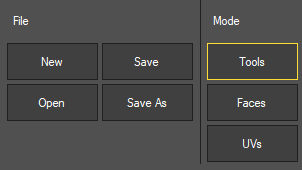
Project opening
To open the model:
- Access the File menu by clicking on the File menu button.
- Access the Open File panel by clicking on the Open button.
- Select a file in the browser.
- Click on Ok.

Paint menu
To create textures:
- Access the Paint menu by clicking on the Paint menu button.
The scene is split in two spaces:
- On the left the scene is displayed with a tree listing textures.
- On the right the texture is displayed.
- Create a new texture by clicking on the New button.
- The texture name is then visible on the tree.

Modes
The paint menu presents different options:
- The Tools mode lets you create a texture with drawing tools.
- The Faces mode lets you apply a texture on the faces of the models in the scene.
- The UVs mode lets you define the position of the faces on the texture.
Wall texture creation
To create the wall texture :
- Select the rectangle tool by clicking on the Rectangle button.
- Open the border color menu by clicking on the color menu upper case.
- Select the blue color.
- Open the background color by clicking on the color menu lower case.
- Select the blue color.
- Draw a rectangle covering the texture.
- Select the Rectangle tool.
- Open the border color menu and select black.
- Open the background color menu and select orange.
- Draw a rectangle along the texture.

Ground texture creation
To create the ground texture:
- Select the rectangle tool by clicking on the Rectangle button.
- Open the border color menu by clicking on the color menu upper case.
- Select the black color.
- Open the background color by clicking on the color menu lower case.
- Select the dark grey color.
- Draw a rectangle covering the texture.

Texture application
To place the wall texture on the model:
- Select the texture on the wall by clicking on it’s name on the list.
- Access the Face mode by clicking on the Face menu button.
- Click on the wall to place the texture.
To place the ground texture on the model:
- Select the texture on the wall by clicking on it’s name on the list.
- Access the Face mode by clicking on the Face menu button.
- Click on the ground to place the texture.

Texture position
To position the wall texture on the model:
- Select the face by clicking on it’s name on the faces list.
- The face contour appears on the right.
- Access the Scale mode by clicking on the Scale menu button.
To scale the face :
- Press the mouse left button.
- Keep the button pressed and move the mouse.
- Release the mouse left button.

Texture save
To save the textures:
- Click on Save As button in the texture creation panel.
- Select the My Documents directory then Edifice 3D then Textures.
- Indicate the name of the texture.
- Click on Ok.
Save your project by pressing Ctrl and S key simultaneously.
