Create your first model
Create a 3D model
In this tutorial we will create a 3D model:
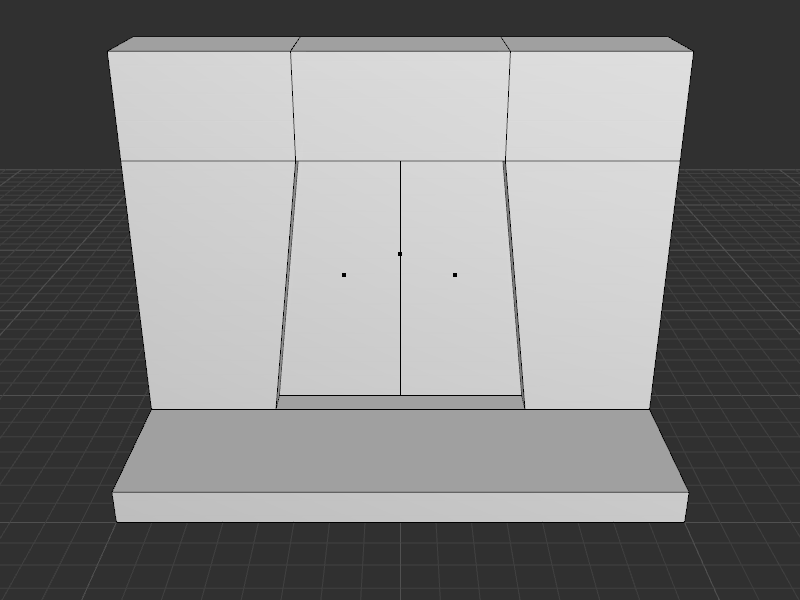
This model will be a door:
- First we will create the frame.
- Then we will create the doors.
- Finally we will save the model.
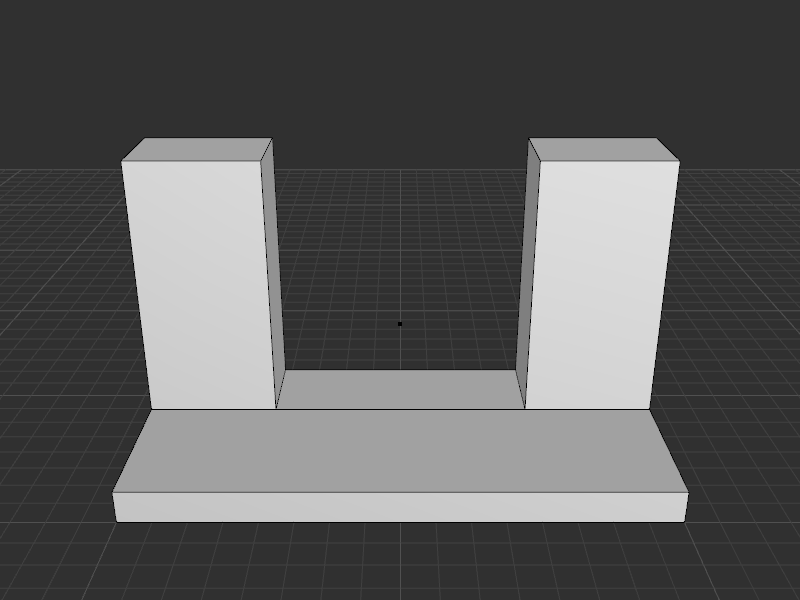
Base creation
We will create a base for the door frame:
To create a base:
- Click on the Modelize menu then on the Box button.
- Or press the B key.
The base will have the following dimensions:
- 16 x 8 cases length and 1 case height.
Show and hide this panel by pressing F1 to create the base.

Base section
We will select the base to create the door frame:
The base will be sectionned according to the follwing dimensions:
- An horizontal section at 5 cases from the front side.
- Two horizontal sections at 4 cases from left and right sides.
To section a face:
- Click on the Update menu then on the Section button.
- Or press the T key.
- Click on the first line to section it.
- Click on the second line to section it.
The section line appears.

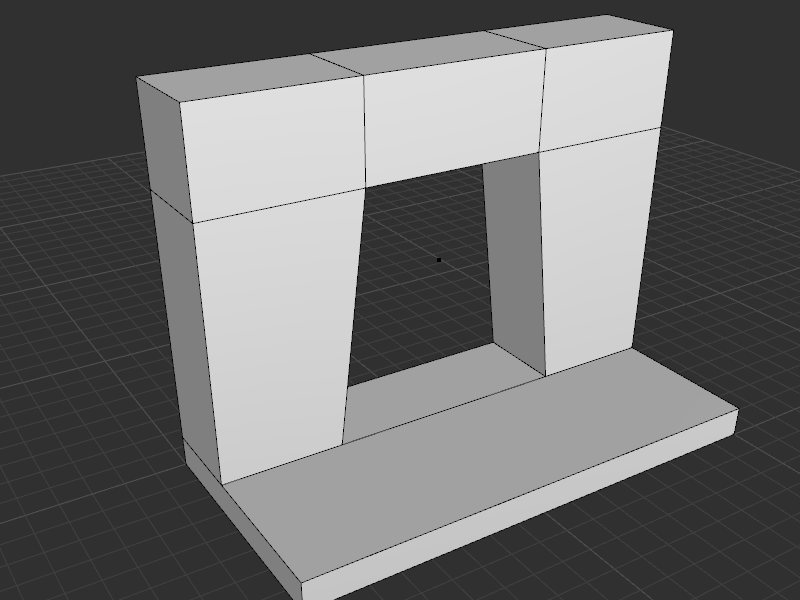
Extrusion
To extrude a shape
- Click on the Update menu then on the Extrude button.
- Or press the X key.
Side update
To select the door:
- Enter in selection mode by pressing Space bar.
- Click on the point at the center of the shape.
To place the door in the frame:
- Click on the Update menu then on the Move button.
- Or press the M key.
- Press the mouse left button.
- Keep the mouse left button down then move the mouse.

Extrusion
Move your point of view for an easier selection.
To rotate your point of view:
- Press the middle mouse button.
- Move the mouse to rotate the point of view.
To zoom
- Scroll the mouse wheel.
To extrude a shape:
- Click on the Update menu then on the Extrude button.
- Or press the X key.
Extrusion
To extrude a shape:
- Click on the Update menu then on the Extrude button.
- Or press the X key.
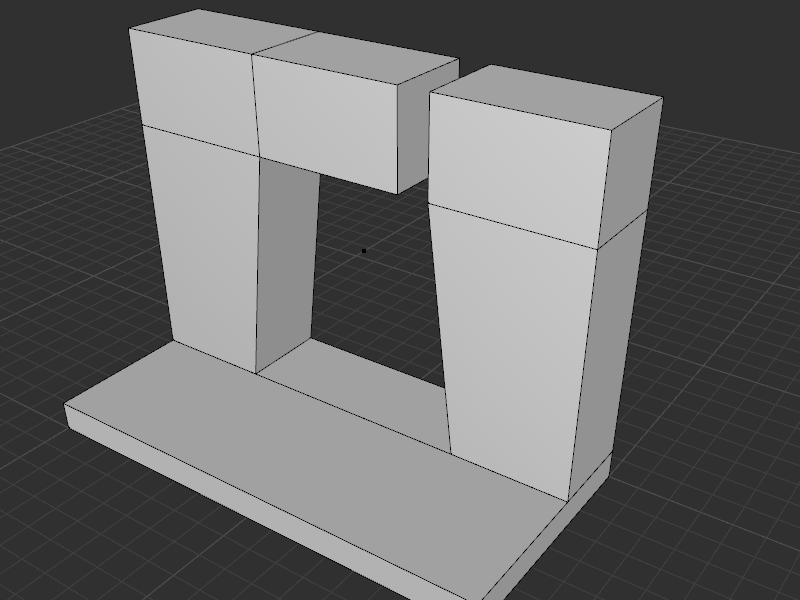
Upper junction creation
We will create the junction between the two sides.
To select a face:
- Enter in selection mode by pressing Space Bar.
- Click on the face.
To select the second face:
- Press the Shift key to keep the first face selected.
- Click on the second face.
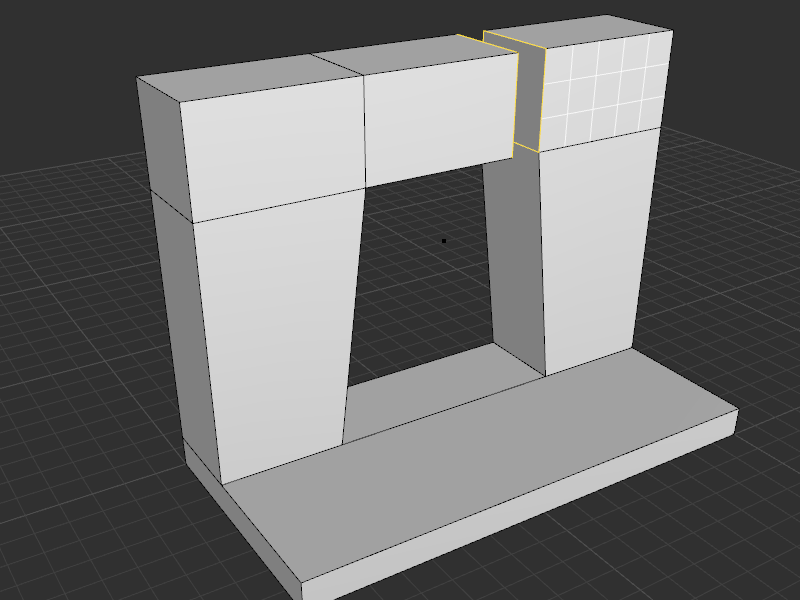
Upper junction creation
To join the selected faces:
- Click on the Update menu then on the Join button.
- Or press the Page Up key (next to Numeric Lock).
Doors creation
We will now create the doors:
To create a door:
- Click on the Modelize menu then on Box button.
- Or press the B key.
The doors will have the following dimensions :
- 4 by 1 cases length and 8 cases height.
We will the update the doors to align them to the frame.
- Select the top left line and move it one case to the right.
- Select the top right line and move it one case to the left.
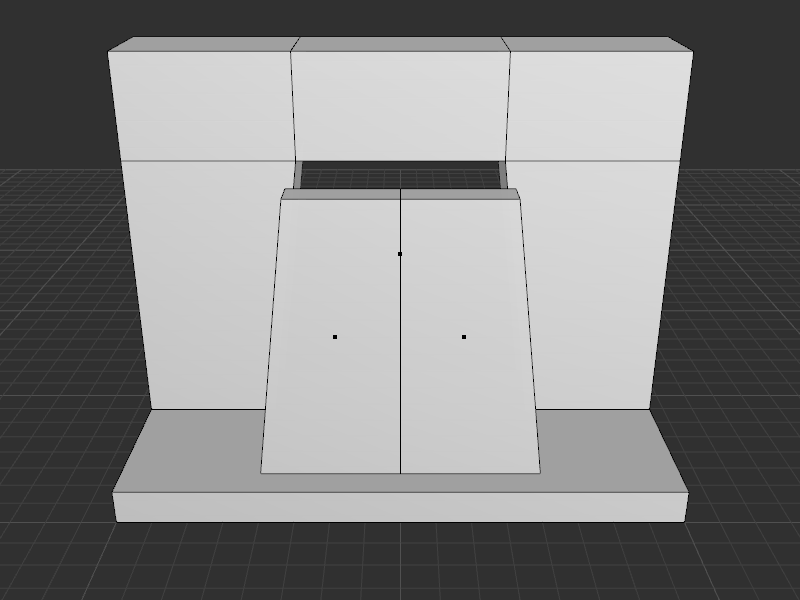
Doors update
We will now place the doors inside the frame:
To select a door:
- Enter in selection mode by pressing Space Bar.
- Click on point inside the shape.
To place the door in the frame:
- Click on the Update menu then on the Move button.
- Or press the M key.
- Press the mouse left button.
- Keep the mouse left button pressed and move the mouse.
Save the model
To save the model:
- Click on the File menu button then on Save As button.
- Select the directory where you want to save the file.
- Indicate the name of the file.
- Click on Ok